How to Set Up and Use the Rotrics DexArm with LightBurn
- Tehoor Marjan
- Creation
- January 21, 2025
Table of Contents
The Rotrics DexArm is a quirky and intriguing addition to the world of 3D printing and laser cutting. Unlike traditional laser cutters, it’s a 4-axis desktop robotic arm with modular versatility, allowing it to switch seamlessly between roles like laser engraving, 3D printing, plotting, and even gripping objects.
This flexibility comes with its own challenges, particularly when integrating it with software like LightBurn, which is primarily designed for conventional setups.
Unfortunately, if you don’t already own one, I can’t recommend buying it. Rotrics abandoned its product a while ago, leaving only the sales running. The Rotrics Studio software is notoriously buggy and feature-poor. But if you’re one of the lucky (or unlucky) DexArm owners, don’t worry—there’s hope!
Today, I’ll guide you through setting up the DexArm on LightBurn, a powerful software for laser cutting and engraving. This post is an update of the LightBurn Configuration page on the fandom wiki.
Important
Linux users
Support for LightBurn on Linux ended after version 1.7.00. If you’re running Linux, keep this in mind before eventual purchase.
First Step
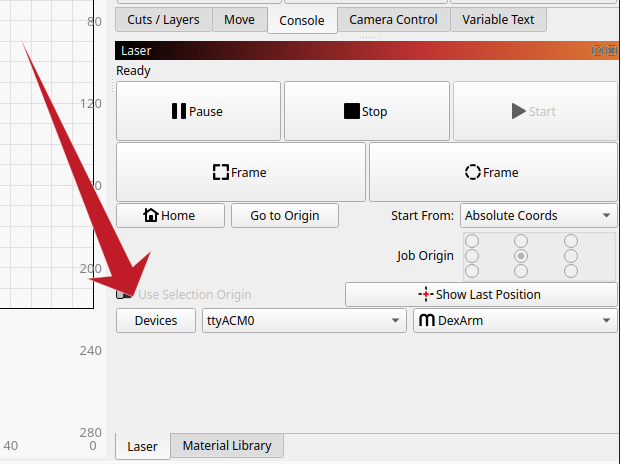
When you first open LightBurn, it might automatically prompt you to create a new device. If not, you can access the device setup dialog manually. Just click on the Devices button located in the sidebar within the Laser panel.
TL;DR: Import file
If you’re short on time and want a quick setup, you can skip the manual process and use my pre-configured file. Download and import it into LightBurn:
And that’s it! You can skip directly to how to use the configuration.
Manual Setup
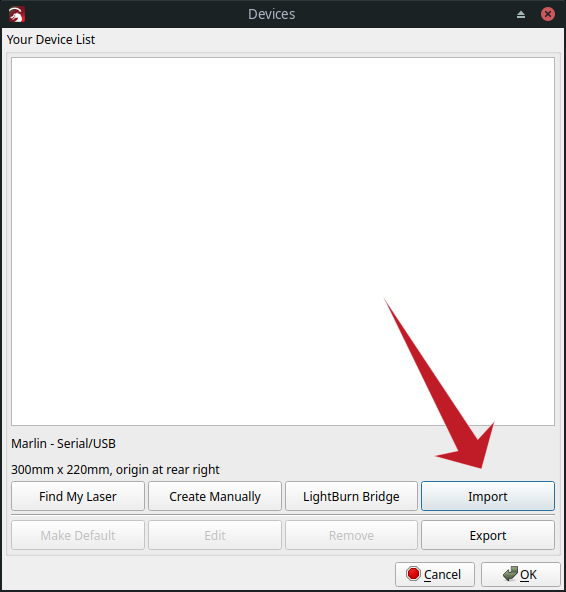
Create a New Device
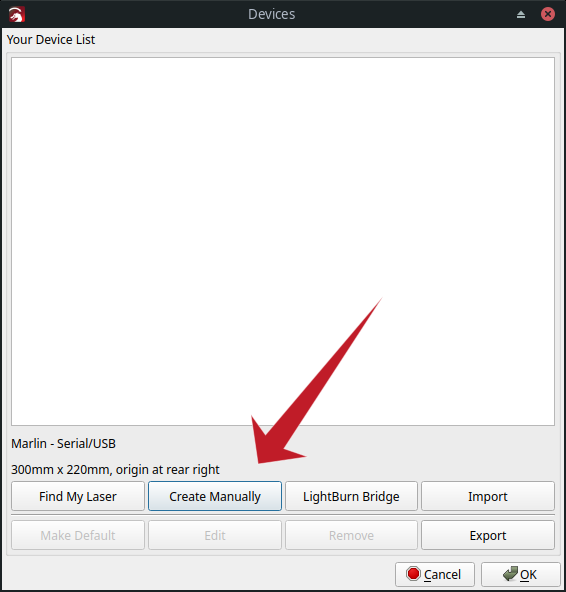
Select the option to Create Manually using the wizard.
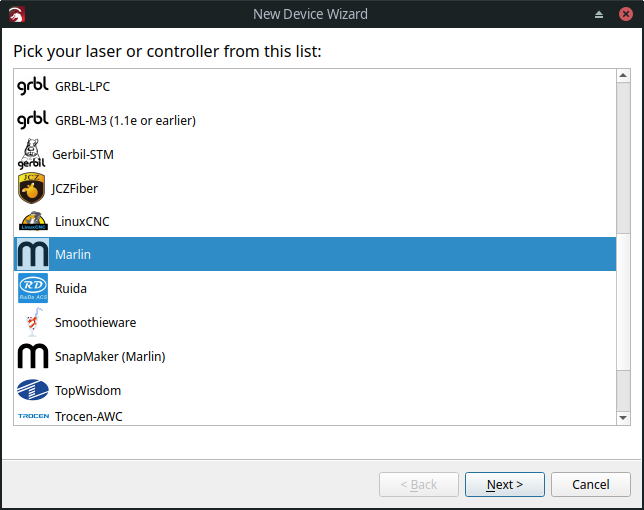
For the controller type, choose Marlin. The DexArm firmware is a customized version of the open-source and popular Marlin firmware.
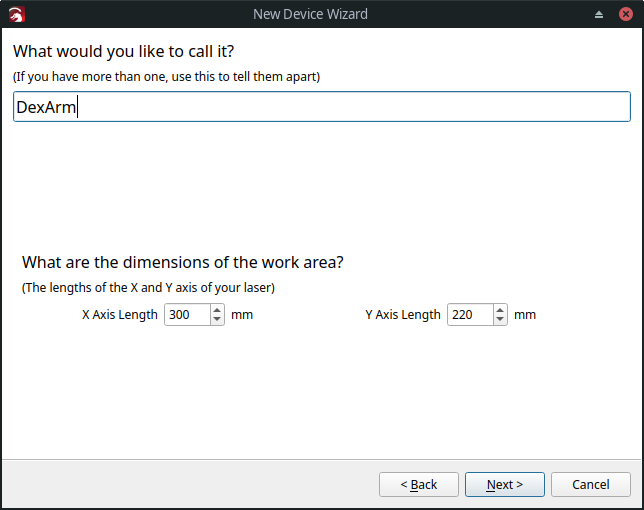
Next, give your device a name (e.g., “DexArm”). Set the dimensions to $300\,\text{mm}$ (X-axis) and $220\,\text{mm}$ (Y-axis). This configuration ensures compatibility with LightBurn’s workspace warnings, even if the arm can’t physically reach the furthest corners.
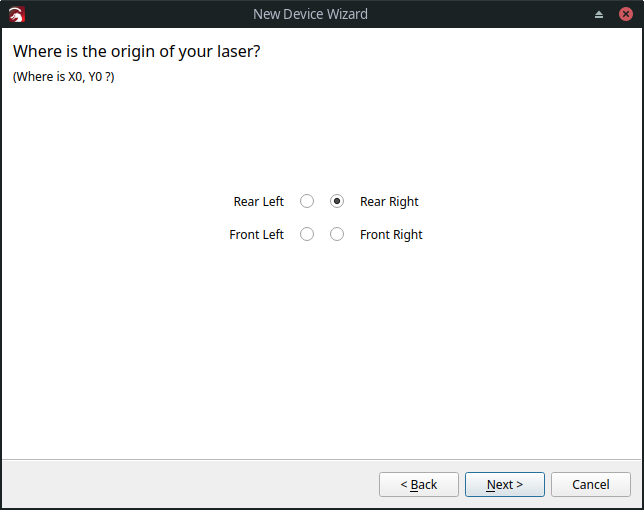
For the laser origin, choose Rear Right. Although not exact, it’s the most intuitive option given LightBurn’s limitations.
Configure Device Settings
Navigate to Edit > Device Settings to tweak some important settings.
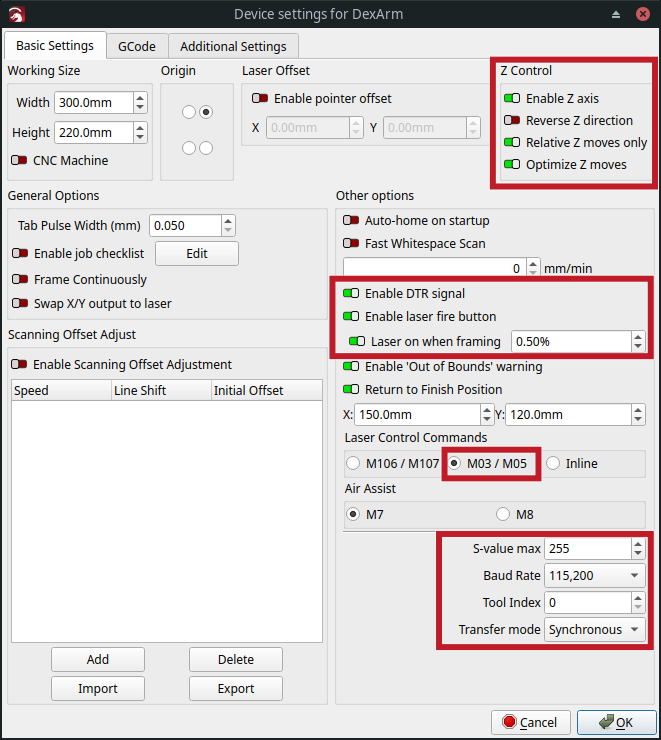
- Enable Z Axis control
- Enable laser fire button
- Optional: Enable Laser on when framing and set laser power to
0.50%. - Select
M03/M05as laser on/off commands - Set/verify the baud rate to
115200 - Set Transfer mode to Synchronous
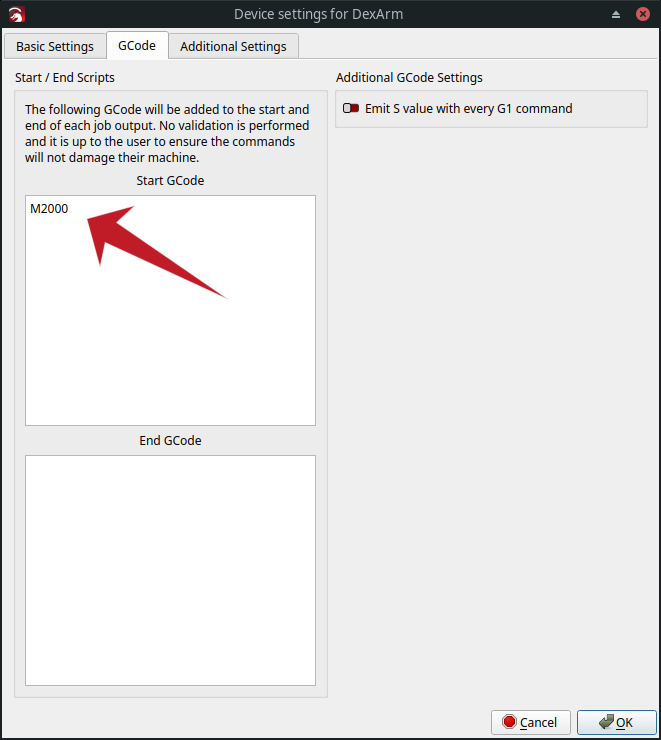
In the GCode tab, you might want to add the M2000 command at startup to
ensure the arm operates in linear mode. While LightBurn primarily uses G1
commands, this acts as an extra safety measure.
Macros
Activate the Console Panel via the Window menu. In the Console tab, you can enter custom G-code commands or set up convenient macros (buttons that execute commands).
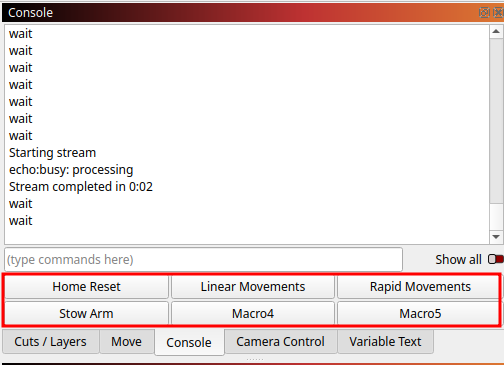
To configure a macro, right-click a button in the Console Panel and input a title and G-code content.

Configure the following buttons:
| Button Label | Macro contents |
|---|---|
| Home Reset | |
| Linear Movements | |
| Rapid Movements | |
| Stow Arm | |
Important
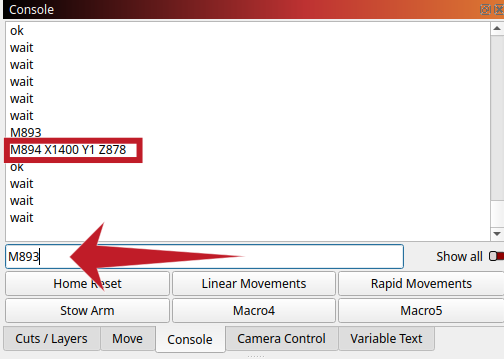
For the Stow Arm macro, you may need to customize the values. Power off the
arm, place it manually in its stowed position, power it back on, and send the
M893 command in the Console Panel. The arm will return the M894 command
with the required values.
Use
Get Ready
Power up the DexArm and open LightBurn.
If you did not yet, in the Window menu, ensure to activate the Console Panel. Now in the sidebar, you have a new tab called Console.
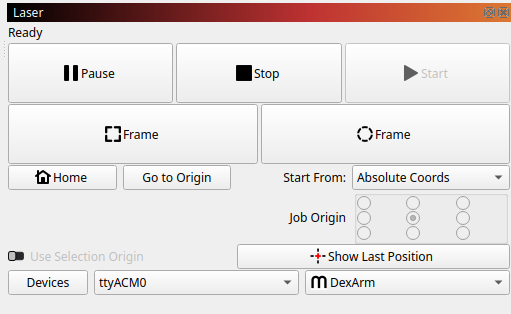
In the Laser panel, select the correct communication port (e.g. /dev/ttyACMx
on Linux, COMx on Windows, /dev/tty.x on Mac) and choose the DexArm
device.
Also ensure that Start From is set to Absolute Coords.
Using the Console panel, click on Home Reset. ⚠️ The arm moves! This will place the arm at the center of the work area.
Info
The Home Reset macro ensures the arm is aligned with LightBurn’s coordinate system. It
M1112: Moves the arm to the factory home positionM888 P1: Sets the current tool to be the laser. This information is needed by the arm, when it translates the Cartesian coordinates to the axis rotations, because the exact position of the tool’s output is slightly offset depending on whether it is the laser beam, the extruding nozzle, the pencil holder, etc.
Note: Despite some older documentation suggestingM880, newer firmware requires the commandM888for tool selection.G92 X150 Y130 Z0: Shifts the working coordinates to make the current position be $X = 150\,\text{mm}$, $Y = 130\,\text{mm}$, $Z = 0\,\text{mm}$
The arm is ready to be used.
Work Area
Even though we’ve configured the work area to a size of $300\,\text{mm} \times 220\,\text{mm}$, note that the arm will not be able to move below $Y = 10\,\text{mm}$ when it is positioned straight ($X \approx 150\,\text{mm}$).
However, the corners located at the top of the workspace in the LightBurn window will be accessible ($(0, 0)$ and $(300, 0)$). Finally, while the arm can easily reach $Y = 220\,\text{mm}$ directly in front of it, the furthest corners (at the bottom of the screen) will not be accessible ($(0, 220)$ and $(300, 220)$).
You can use the positioning tool in LightBurn to check whether the farthest and closest points on your engraving are accessible with the arm before starting the actual print.
Print and Cut Calibration
Refer to the LightBurn Print and Cut documentation, or the video
Info
The DexArm has two movement modes that you can select using the macro buttons Rapid Movements or Linear Movements. When using Linear Movements, the head of the laser draws a straight line between the starting point and the end point. This is of course necessary for printing. However, from the rotation axis perspective, this may imply a form of “back and forth” movement, which is not necessary when all you want is just move the arm from one point to another.
Select Rapid Movements for adjusting and calibration. Select Linear Movements when really engraving or cutting. The device is set up to automatically select Linear Movements at the beginning of a print.
Stowing the Arm
Before powering off the DexArm, use the Stow Arm macro. This ensures the arm retracts to a safe position, preventing damage when powered down. (When torque is released from the motor, and the arm is extended, its weight can make it knock the table or the finished work, damaging both the arm and the support.)
And there you go—your DexArm is all set up and ready to create!